The VGT solenoid, also vane position solenoid or vane position actuator, ultimately controls the position of the vanes in the variable geometry turbine housing by controlling the flow of engine oil into the piston assembly. Excessive turbocharger lag and overall low performance are typical signs of a VGT solenoid failure, however there are many alternative failures that can cause identical or similar symptoms. It is just as likely (and more common) for the unison ring and vanes in the variable geometry turbine housing to become caked with exhaust grime and fail to move to the commanded position.
VGT Solenoid Diagnostics & Troubleshooting
Note that a failed VGT solenoid defaults to the open position, making it difficult to build boost as the vanes in the turbine housing will not be concentrating exhaust flow across the turbine at low speeds. A seized unison ring or VGT vanes are likely more common than actual VGT solenoid failures, but it is important to rule out the solenoid before pulling and disassembling the turbocharger to further investigate.
First test the solenoid by commanding it between the open and closed positions with an appropriate scantool while monitoring the MAP (manifold absolute pressure) parameter ID with the engine running. If there is no change in MAP and no audible indication (listen closely) that the vane position was changed, then there is a problem with the turbo function. If the VGT position changed as commanded, the solenoid is in good working order and the components inside the turbine housing are functioning properly.
If the VGT position is not responding to commands via a scantool, unplug the VGT solenoid connector and measure the resistance across the coil with a digital multimeter (removing the connector will expose two male pins on the solenoid). The resistance across the solenoid coil should be between 3.42 & 4.18 Ohms when engine oil temperature (EOT) is at 73° F. If the resistance reading is out of spec, replace the solenoid.
VGT Solenoid Part Numbers
Description |
Part Number(s) |
Remarks |
VGT solenoid |
Garrett 792593-0001 |
--- |
High temperature anti-seize |
--- |
How to Replace the VGT Solenoid on a 6.0 Power Stroke
Click any thumbnail to view high resolution fullsize image w/ addition details (where applicable)
• Disconnect both negative battery cables.
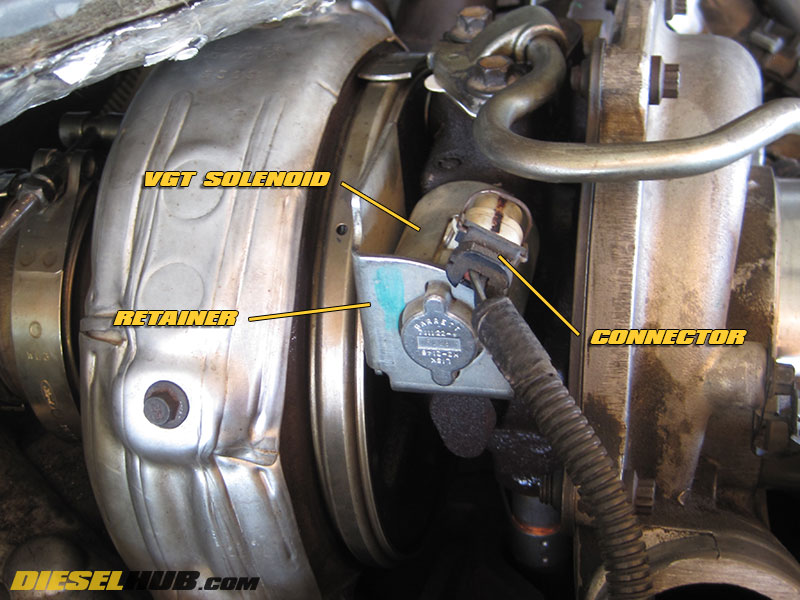
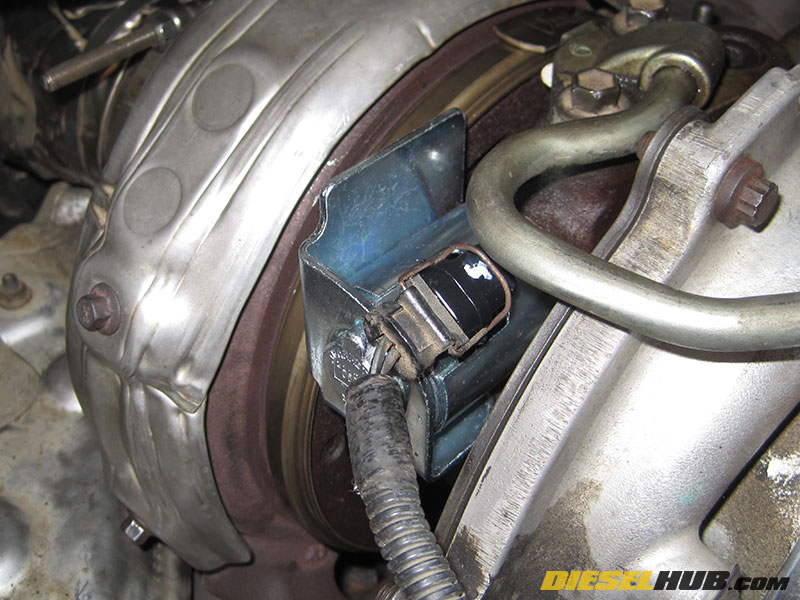
• The VGT solenoid protrudes from the bearing housing (center section) of the turbocharger. Locate and remove the VGT solenoid electrical connector.
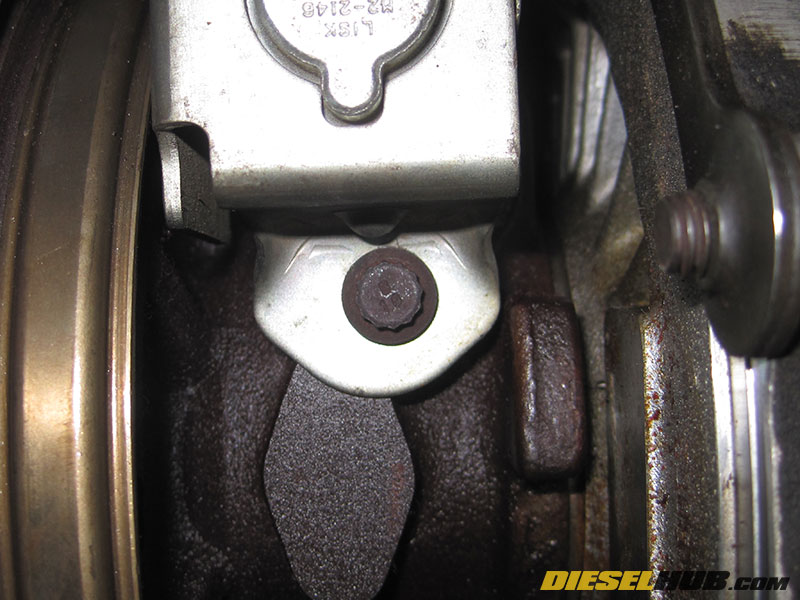
• The VGT solenoid is held in place by a bracket that is secured with a single retaining bolt - remove the bracket bolt with an 8 mm, 12 point socket.
• Pull the solenoid straight outwards while twisting side-to-side as permitted - a reasonable amount of force is required to unseat the series of o-rings on the solenoid valve. Keep the solenoid orientation parallel to its bore, i.e. do not rock it against the bore in the bearing housing.
• Have a clean rag handy in order to catch the solenoid, which will be covered in motor oil.

• Soak the valve and o-rings of the new VGT solenoid in fresh 15W-40 motor oil for several minutes.
• The replacement solenoid includes a new bracket and retaining bolt, so do not reuse the old hardware.
• Make sure the o-rings on the solenoid valve are well lubricated, then install the solenoid in reverse order by pushing it into the bore in the bearing housing until it is seated. The solenoid will have a tendency to push out slightly until the bracket is installed.
• Install the solenoid bracket, lightly coating the retaining bolt with high temperature anti-seize to permit future removal. Torque the retaining bolt to 18 lb-ft.
• Clean the electrical connector using a plastic safe electrical connector/contact cleaner, then reinstall the connector. Do not forget to snap the connector retaining clip into place.