The 6.0L Power Stroke features two fuel filters - the primary fuel filter is located in the HFCM, or Horizontal Fuel Conditioning Module, mounted to the driver side frame rail. The HFCM also contains the water-fuel separator. The secondary filter is positioned on the top side of the engine, just right of the engine oil filter. Fuel filter replacement is a critical service procedure, particularly for modern engines such as the 6.0L Power Stroke. Ford recommends replacing both fuel filters at 15,000 mile intervals under "normal" service conditions and 10,000 mile intervals under "severe" service conditions; this coincides with every-other engine oil change.
Fuel Filter Part Numbers
Description |
Part Number |
Remarks |
Fuel filter kit |
[1] |
|
HFCM drain plug |
[2] |
|
Fuel filter housing cap |
[3] |
[1] - Includes chassis and engine mounted fuel filters, all required o-rings/gaskets
[2] - Improved drain plug from Ford Motor Company
[3] - Reusable; replace if damaged or cracked
How to Replace the Fuel Filters on a 6.0 Power Stroke Engine
Click any thumbnail to view high resolution fullsize image w/ addition details (where applicable)

• Locate the HFCM on the driver side frame rail between the engine and fuel tank.
• Remove the drain plug for the water-fuel separator and drain the fuel into a container (such as a quart mason jar). This tends to be a messy procedure, but you can minimize spillage by positioning the container close to the drain plug and allowing the drain plug to fall into the container. Allow the HFCM to drain completely, then fish out the drain plug and dispose of the fuel. The drain plug on the HFCM fuel-water separator drain uses a 6 mm Allen wrench.
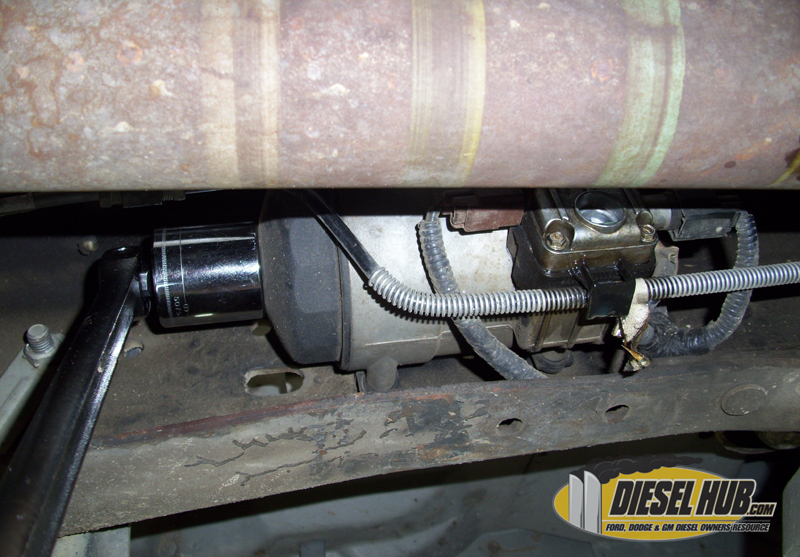
• Once the HFCM has been drained completely remove the primary fuel filter cap with a 36 mm socket. Accessing the filter cap is more difficult on four wheel drive trucks; a breaker bar or box end wrench is slim enough the move into position. A standard ratchet tends to be too large.
• The fuel filter generally comes out with the cap; if it does not, remove it manually. You may need to separate the fuel filter from the cap in order to maneuver them both out of the frame rail.
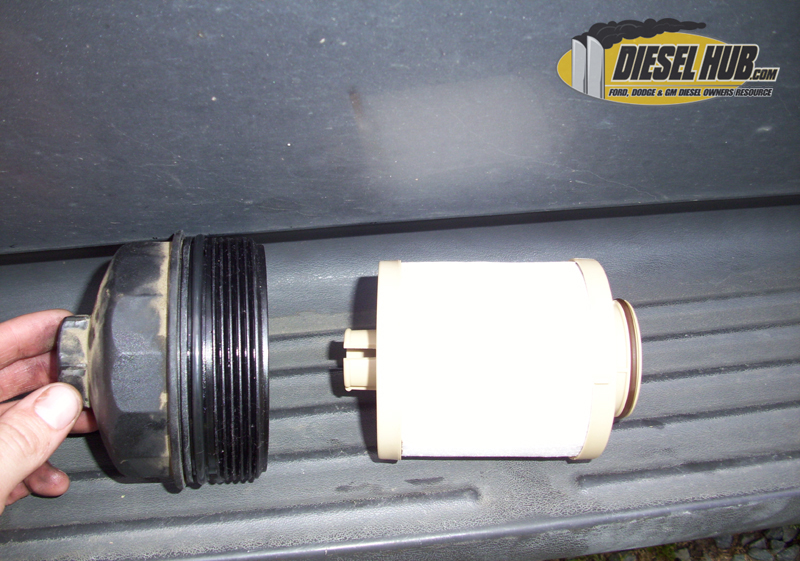
• Remove the fuel filter from the cap by simply pulling it out. There is a retaining clasp on the fuel filter that snaps into the fuel filter cap.
• Remove and replace the o-ring from the fuel filter cap.
• Install the new fuel filter, minding the orientation of the locking clasp and the o-ring. The o-ring side of the fuel filter is not inserted into the cap. The fuel filter should lock into the cap.
• If you have a four wheel drive vehicle, you may need to assembly the fuel filter into the cap once both have been positioned back into the frame rail - you likely noticed that it is a tight squeeze between the cross member and drive shaft when the two parts are assembled.
Lightly coat both o-rings (cap and bottom of filter) of the new fuel filter with clean motor oil before installing into the HFCM. Torque cap to 19 lb-ft (25 N-m).
• Reinstall the fuel-water separator drain plug.

• The secondary fuel filter is located next to the engine oil filter on top of the engine. Remove the cap with either a 24 mm socket or 1/2 inch square drive. Using a square drive to loosen the cap has a tendency to strip/damage the plastic hex head overtime and using the appropriate socket is therefore advised (a 15/16" socket also fits rather well).
• Remove and discard the used fuel filter.
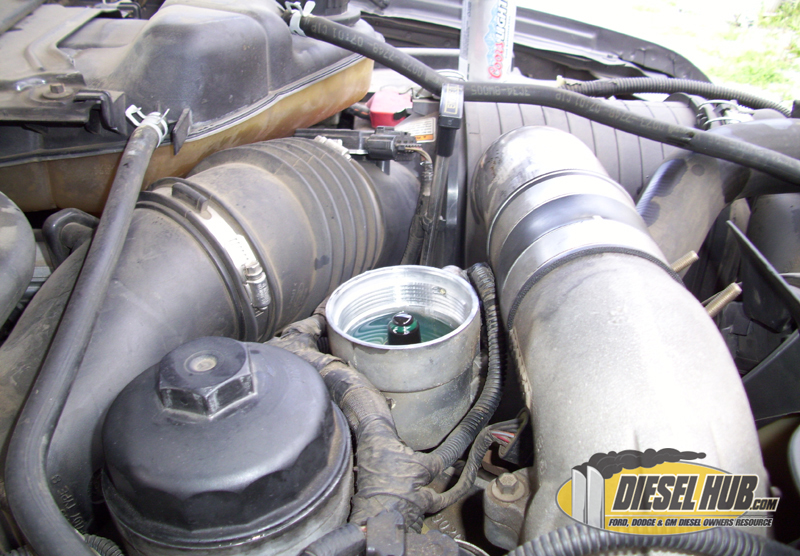
• Drain the fuel filter housing of any fuel. An oral syringe or turkey baster work well.
• Install the new fuel filter into the fuel filter housing.
• Remove and replace the o-ring on the fuel filter cap. Lightly coat the o-ring with clean motor oil, then reinstall the cap. Torque to 10 lb-ft (14 N-m); do not overtighten the cap.
• Turn the key into the "run" position (as you would to initiate the glow plug sequence) for 30 seconds, then back to the "off" position. Repeat this procedure a minimum of 3 times in order to prime the fuel system before starting.