A low boost condition on the 7.3L Power Stroke can be caused by a number of problems, including a leak on the compressor side of the turbo plumbing, a leak on the exhaust side of the turbo, or a combination of both. It is relatively common for leaks on both the compressor side and the turbine side of the turbocharger to develop over time. On the turbine side, it is typical and entirely normal for the exhaust gaskets to deteriorate and leak at the pair of joints that connect the left and right up-pipes to the up-pipe collector, which is attached to the inlet of the turbocharger turbine housing. When this occurs, exhaust pressure across the turbine is reduced and overall performance can be critically affected. A leaking up-pipe seal can be identified by visible build up of exhaust soot around the up-pipe collector flanges and, in extreme cases, on the firewall in the vicinity of the up-pipe connections.
Up-Pipe Gaskets & Related Parts List
Part Description |
Part Number(s) |
Remarks |
Up-pipe donut gasket |
[1] |
|
GT38 turbo reinstall kit |
Ford F81Z-6N653-BA |
--- |
Turbine inlet to up-pipe collector clamp |
--- |
|
Compressor to intake "spider" clamp |
--- |
|
Turbine outlet to downpipe Marman clamp |
--- |
[1] - Sold individually
How to Replace the Up-Pipe Gaskets on a 7.3 Power Stroke
Click any thumbnail to view high resolution fullsize image w/ addition details (where applicable)
• Disconnect both negative battery cables.
• Remove plastic "Power Stroke" engine cover (if applicable).
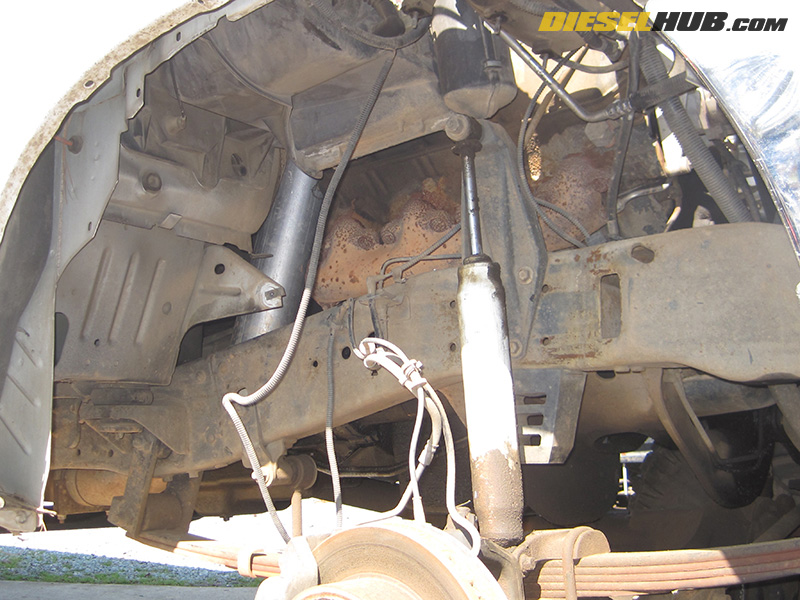
• Remove passenger side inner fender (various fasteners requiring 5/16" and 3/16" sockets). You will need to disconnect and set aside anything mounted to or supported by the inner fender, i.e. 4 wheel drive vacuum lines.
• Remove turbocharger, see: late 1999 - 2003 7.3L Power Stroke turbocharger removal instructions
• Remove the bolt holding the transmission fluid dipstick against the engine block (passenger side rear of engine block, automatic transmission applications only). This improves access to the rear exhaust collector bolt on the passenger side.
• All collector bolts require a 10 mm socket - a deep socket is not necessary and may actually cause greater interference than a shallow socket.
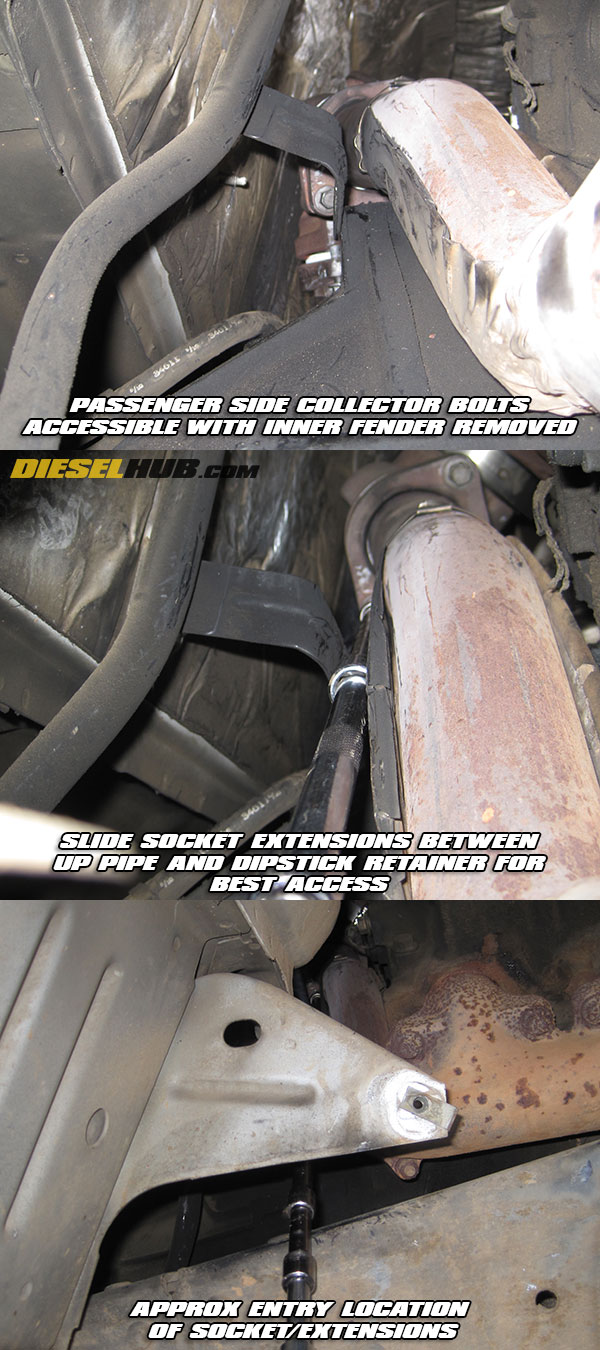
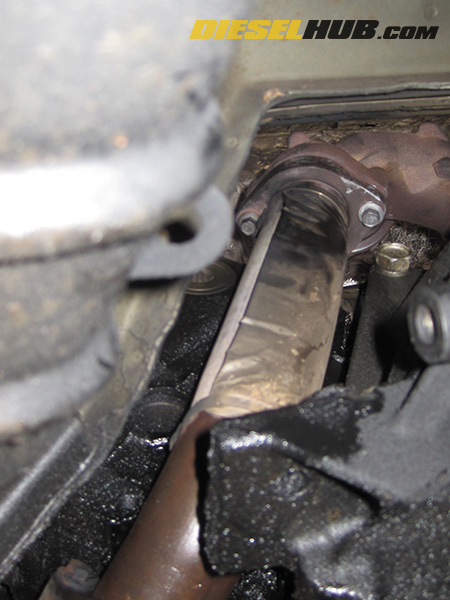
• The passenger side rear collector bolt is the most difficult to access and as such we suggest removing it first. You will need somewhere in the ballpark of 26 inches of total extension to reach the bolt. It is inaccessible from under the hood, so you'll need to set your socket/extensions between the firewall and passenger side exhaust up-pipe, positioned between the engine block and the transmission dipstick (automatic transmission only), coming in through the passenger side fender well. See series of fullsize images for clarification.
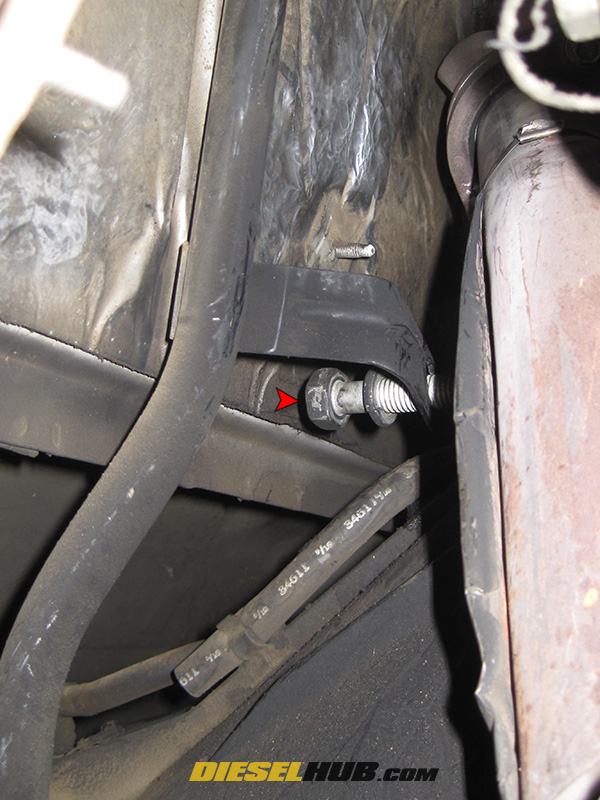
• The passenger side front "Y" collector bolt is accessible from under the hood using a 10 mm box end wrench.
• The driver side rear "Y" collector bolt is accessible from underneath the truck. You will once again need around 26 inches of extension to reach the bolt. It is not particularly difficult to reach, although a second pair of hands is helpful in aligning the socket from under the hood.
• The drive side front "Y" collector bolt is accessible from underneath the truck or from under the hood. It is not particularly difficult to access.

• Discard (do not reuse) the collector bolts and remove the "Y" collector. You may need to rock the collector side-to-side as you apply force upwards to remove it.
• Remove and replace the exhaust donut gaskets. If the up-pipes are damaged or kinked where the collector sits, they are likely to leak again and should be replaced or repaired. An exhaust expander can be used to expand pipes that are misshapen.
• Reinstall the "Y" collector and hand tighten all bolts. Do not reuse the hardware! Always use new collector bolts. You may wish to apply a small amount of anti-seize on the bolt threads prior to installation. The collector should be loose enough to rock side-to-side at this point.
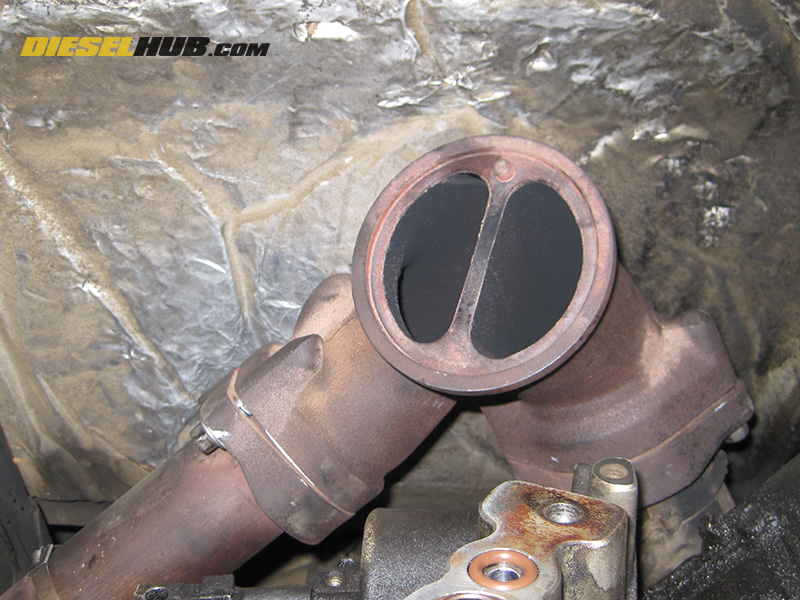
• Position the collector Marman clamp onto the exhaust "Y" collector. Make sure it is loose enough to maneuver slightly so that it can be aligned with the turbocharger.
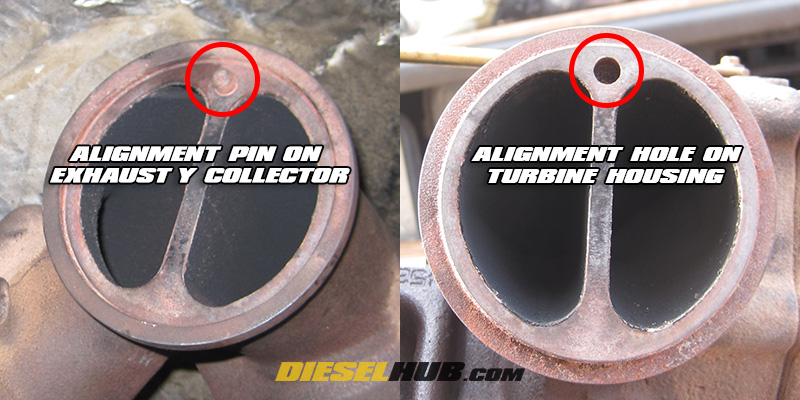
• Notice the small extruded pin cast into the top of the "Y" collector where it mounts to the turbocharger. This must align with the corresponding indentation in the turbocharger turbine inlet during reinstallation.
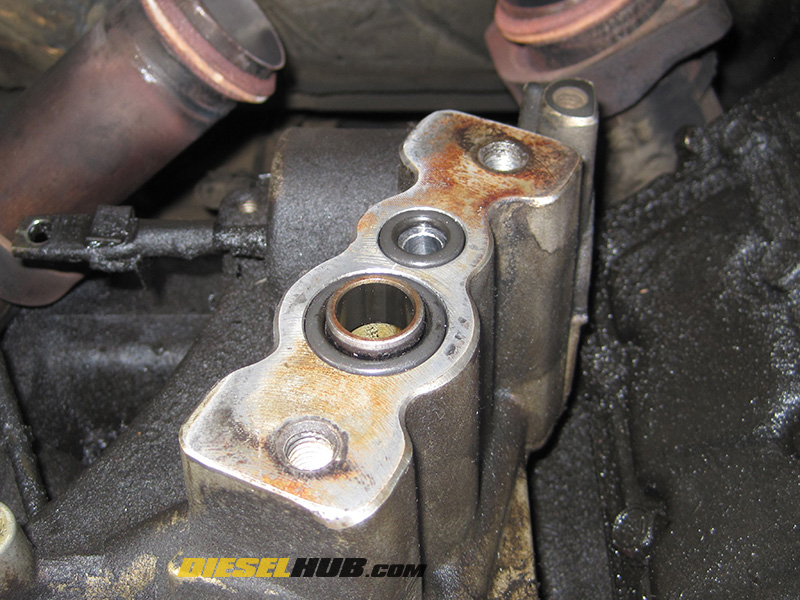
• Replace the pair of turbocharger pedestal o-rings - these are not to be reused. Lightly lubricate them with clean engine oil prior to installation.
• Install a new Marman clamp on the exhaust "Y" collector loosely as not to interfere with turbocharger re-installation.
• It is recommended to replace the EBPV linkage clip with a new one, as supplied in the turbocharger reinstall kit, before reinstalling the turbo.
• Reinstall the turbocharger onto the turbo pedestal, line up and reinstall the EBPV linkage. Also ensure that the indentation on the turbocharger turbine is properly aligned with the "Y" collector alignment pin, then install the turbocharger to pedestal bolts hand tight.
• Torque turbocharger pedestal bolts to 18 ft-lbs.
• Align, tighten, then torque the up-pipe collector to turbine Marman clamp to 60 in-lbs.
• Torque all "Y" collector bolts to 21 ft-lbs; torque all bolts twice.
• Reinstall transmission dipstick to engine block retaining bolt (automatic transmission, if previously removed).
• Reinstall the exhaust downpipe, torque Marman clamp at turbine outlet to to 60 in-lbs.
• Remove any rags in the intake manifold openings, then reinstall the intake manifold plenum using a new o-ring seal between the plenum and turbocharger. Lightly lube the new o-ring with clean engine oil.
• Tighten intake plenum to turbocharger clamp - snug, do not over-tighten.
• Tighten intake manifold to intake plenum boots.
• Reinstall intercooler tubes to the intake plenum, tighten all clamps.
• Reinstall remaining sensors, intake tubing, and wastegate actuator lines.
• Reinstall inner fender, reconnect negative battery cables.